Introduction:
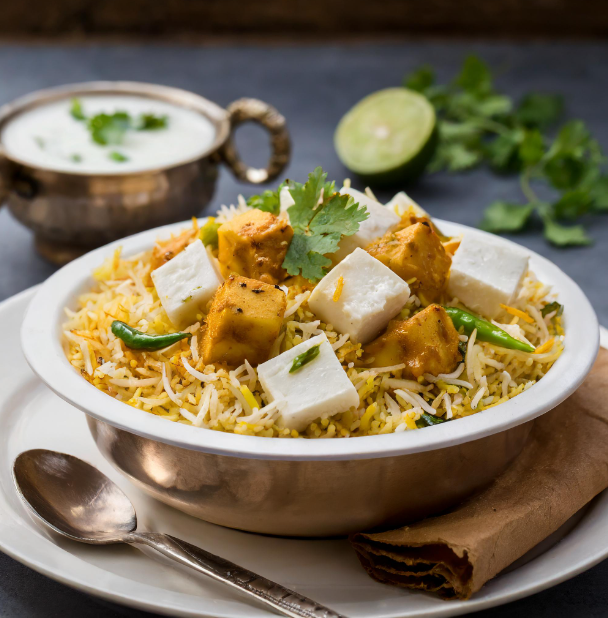
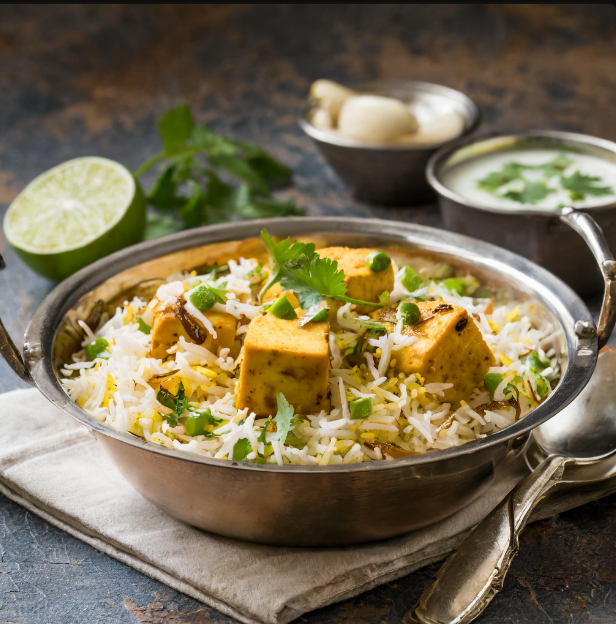
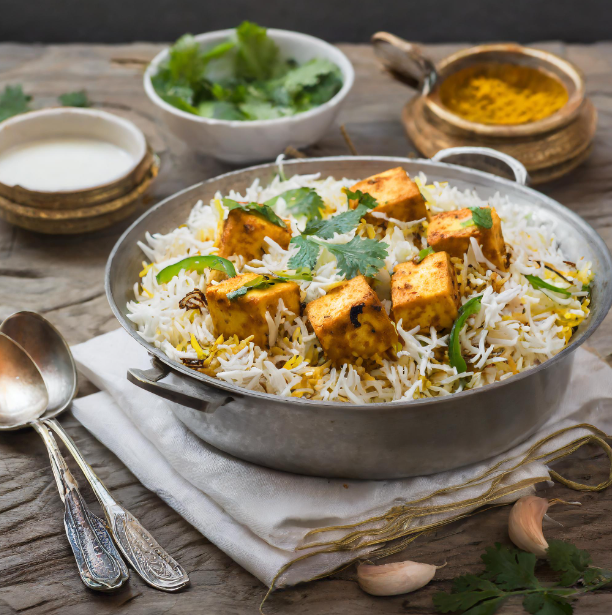
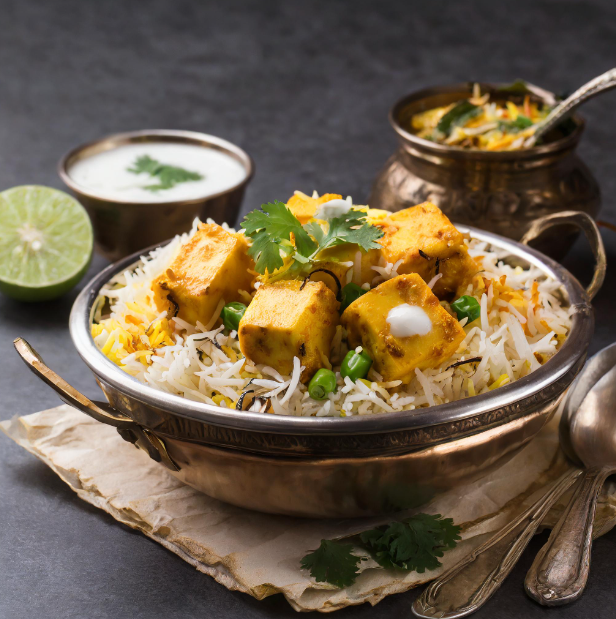
Enjoy the aromatic flavors of Indian food with this scrumptious Paneer Biryani Recipe. Paneer Biryani is a vegetarian take on the classic biryani, featuring fragrant basmati rice, luscious paneer cubes, aromatic spices, and a richly flavored gravy.
This renowned dish is a favorite of both vegetarians and biryani fans, known for its vivid colors, delicious aroma, and seductive flavor. In this article, we will provide the traditional Paneer Biryani Recipe in English and walk you through the steps of making this culinary masterpiece in your own kitchen.
Ingredients for paneer biryani recipe:
For Marinating Paneer:
- 250 grams paneer (Indian cottage cheese), cubed
- 1/2 cup yogurt (curd)
- 1 tablespoon ginger-garlic paste
- 1 teaspoon red chili powder
- 1/2 teaspoon turmeric powder
- 1 teaspoon garam masala
- Salt to taste
- 1 tablespoon oil
For Rice:
- 2 cups basmati rice, soaked for 30 minutes
- 4 cups water
- 1 bay leaf
- 2-3 green cardamom pods
- 2-3 cloves
- Salt to taste
For Biryani Gravy:
- 2 tablespoons ghee (clarified butter) or oil
- 1 large onion, thinly sliced
- 2 tomatoes, finely chopped
- 1 green chili, slit lengthwise
- 1 tablespoon ginger-garlic paste
- 1 teaspoon cumin seeds
- 1/2 teaspoon turmeric powder
- 1 teaspoon red chili powder
- 1 teaspoon coriander powder
- 1/2 teaspoon biryani masala
- Salt to taste
- Fresh coriander leaves for garnish
- Fried onions for garnish (optional)
- Saffron strands soaked in warm milk for garnish (optional)
For Layering:
- 1/4 cup milk
- A pinch of saffron strands
- Fresh mint leaves for layering
Step-by-Step Recipe:
Step 1: Marinate the Paneer:
- In a mixing bowl, combine the yogurt, ginger garlic paste, red chili powder, turmeric powder, garam masala, salt, and oil.
- Add the paneer cubes to the marinade and gently toss to coat evenly.
- Cover the bowl and refrigerate the paneer for at least 30 minutes.
Step 2: Cook the Rice:
- Rinse the soaked basmati rice in running water until it is clear.
- In a big pot, heat 4 cups of water to a boil.
- Add the bay leaf, green cardamom pods, cloves, and salt to the boiling water.
- Drain the soaked rice and place it in the boiling water.
- Cook the rice until it is 70–80% done. The grains should be firm and delicate. Drain the rice and set it aside.
Step 3: Prepare Biryani Gravy:
- Heat the ghee or oil in a big pan or kadhai over medium heat.
- Add the cut onions and cook until golden brown and caramelized.
- Allow cumin seeds to splutter.
- Add the ginger-garlic paste and green chilies. Sauté for one minute, or until the raw aroma vanishes.
- Cook the diced tomatoes until they are soft and mushy.
- Combine the turmeric powder, red chili powder, coriander powder, biryani masala, and salt. Mix well.
- Cook the gravy for 2-3 minutes, until the spices are fully blended and the oil separates from the masala.
- Add the marinated paneer cubes to the stew and gently stir to coat with the masala. Cook for an additional 2-3 minutes. Adjust the seasoning as needed. Remove from the heat and put aside.
Step 4: Layering the Biryani:
- In a small bowl, combine saffron threads with heated milk and soak for a few minutes.
- Grease the bottom of a deep-bottomed pan or biryani pot with ghee or oil.
- Spread cooked rice evenly across the bottom of the pan.
- Sprinkle some fresh mint leaves on the rice.
- Spread half of the paneer gravy evenly over the rice.
- Repeat layering with the remaining rice and paneer gravy, finishing with a layer of rice on top.
- Drizzle the saffron-infused milk on top of the rice.
- Garnish with fried onions (optional) and fresh coriander leaves.
Step 5: Dum Cooking (Slow Cooking):
- To seal in the flavors, cover the pan tightly with a lid or aluminum foil.
- Place the pan on a tawa (griddle) or heat diffuser set to low heat.
- Allow the biryani to cook on low heat for 15-20 minutes. This prolonged cooking method, known as dum cooking, allows the flavors to combine and the rice to absorb the aroma of the spices.
- Remove the pan from the heat and let it cool for another 5-10 minutes without lifting the lid.
Step 6: Serve Hot:
- Gently fluff the biryani with a fork to combine the layers.
- Transfer the Paneer Biryani to a serving tray, scooping from the bottom to reveal the layers.
- If preferred, garnish with more fried onions, fresh coriander leaves, and saffron-infused milk.
- Serve the delicious and fragrant Paneer Biryani with raita, salad, or your preferred side dish.
Additional Tips for Perfect Paneer Biryani recipe:
- Choose fresh and soft paneer for the greatest texture and flavor in your biryani. If using pre-made paneer, soak it in warm water for 15-20 minutes to soften it before marinating.
- Marination Time: Allow at least 30 minutes for the paneer to fully absorb the marinade’s flavors. To achieve even better results, marinate the paneer in the refrigerator for at least 2 hours.
- cook Paneer (Optional): To add flavor and texture, cook the marinated paneer cubes till golden brown before adding them to the stew. This process improves the taste and gives the paneer a crispy texture.
- Rice consistency: Cook the basmati rice until it is 70-80% cooked. The rice grains should be firm but tender, as they will continue to cook during the dum process. Overcooked rice might become mushy, compromising the texture of the biryani.
- stacking Technique: When stacking the biryani, ensure that the rice and gravy are evenly distributed so that each bite has a balance of flavors. Avoid pressing too tightly on the layers, as this will condense the rice and make the biryani dense.
- Dum Cooking Tips: To trap the steam within during the dum cooking process, use a thick lid or enclose the pan’s edges with aluminum foil. This helps to cook the biryani evenly and infuse the flavors into the rice and paneer.
- Garnish the Paneer Biryani generously with fried onions, fresh coriander leaves, and saffron-infused milk for a more beautiful presentation and aroma. You can also add a few drops of rose or kewra water for a pleasant finish.
- Resting Period: After cooking, allow the biryani to rest for 5-10 minutes before serving. This resting period allows the flavors to combine and the biryani to settle, yielding a more flavorful and unified meal.
- Serve the Paneer Biryani with a crisp cucumber raita, acidic pickle, or salad to balance out the richness. A squeeze of lemon juice over the biryani just before serving offers a refreshing surge of flavor.
- Paneer Biryani tastes best when made fresh, but leftovers can be refrigerated in an airtight container for up to two days. Before serving, gently reheat in the microwave or oven with a dash of water to prevent drying.
By including these additional suggestions into your Paneer Biryani preparation, you will take the dish to new heights, creating a delectable and aromatic culinary experience that will please both your family and guests. Enjoy the rich flavors and textures of this vegetarian delicacy, and experience the joy of homemade biryani with each bite!
Conclusion:
With our thorough Paneer Biryani Recipe in English, you can replicate the genuine flavors of this traditional Indian dish directly in your own kitchen. Whether served at a festive gathering, a special event, or as a cozy meal at home, Paneer Biryani’s aromatic spices, luscious paneer, and fluffy rice will impress.
So, follow the step-by-step instructions, appreciate every delectable bite, and treat your taste buds to this vegetarian delicacy. Have fun cooking!
You might also like: Dal Khichdi Recipe: A Symphony of Flavors in Every Bite

Pingback: Crispy Aloo Tikki Recipe: Authentic & Delicious | 2024